If you’ve worked with verifiable credentials before, you know that development involves a lot more scanning QR codes than other projects. Because of the focus on user-centric design, verifiable credential flows involve a lot of back and forth between your application and your end-user. Most mobile identity wallets use a QR code to create connections or to start an issuance or proof process (for a demonstration, watch our introduction to Paradym. This article goes into how to use different Paradym features to work with a wallet, build a wallet, or test a user flow that involves wallets. It also features some other helpful tips to set you up for success while you’re building.
The Wallet
When building a solution that uses verifiable credentials, you’ll most probably need a wallet (unless a wallet is the solution you’re building). Whether during development or in production. For your end-users to interact with your solution, a wallet is needed. The wallet is where a company or person stores their digital credentials and (often) receives the requests for proof of information. Cloud wallets are often used for organizations, while mobile wallets are often used for individuals.
If you’re looking for a fully functional mobile wallet that’s already compatible with Paradym, go and take a look at the Paradym Wallet. The Paradym mobile wallet is open source, free, and available in both the App Store and Play Store. You can utilize the Paradym wallet in different ways.
- Have your users download and use it directly to store their credentials and interact with your solution.
- Use it during development to test your solution.
- Use the open-source code as reference material or as a starting point for your own customized wallet.
Already have an identity wallet in place? Look into how to integrate your Paradym solution with a holder wallet in the Paradym docs.
Testing your Workflow
Once you have your identity wallet set up, you can test out the end-to-end flow of your solution by running your workflow. Paradym has several options to trigger your workflow when it is needed, but during development, you’ll probably want to run your workflow manually. With a manual execution, you can input any values immediately in the dashboard and have the workflow run as it would in production.
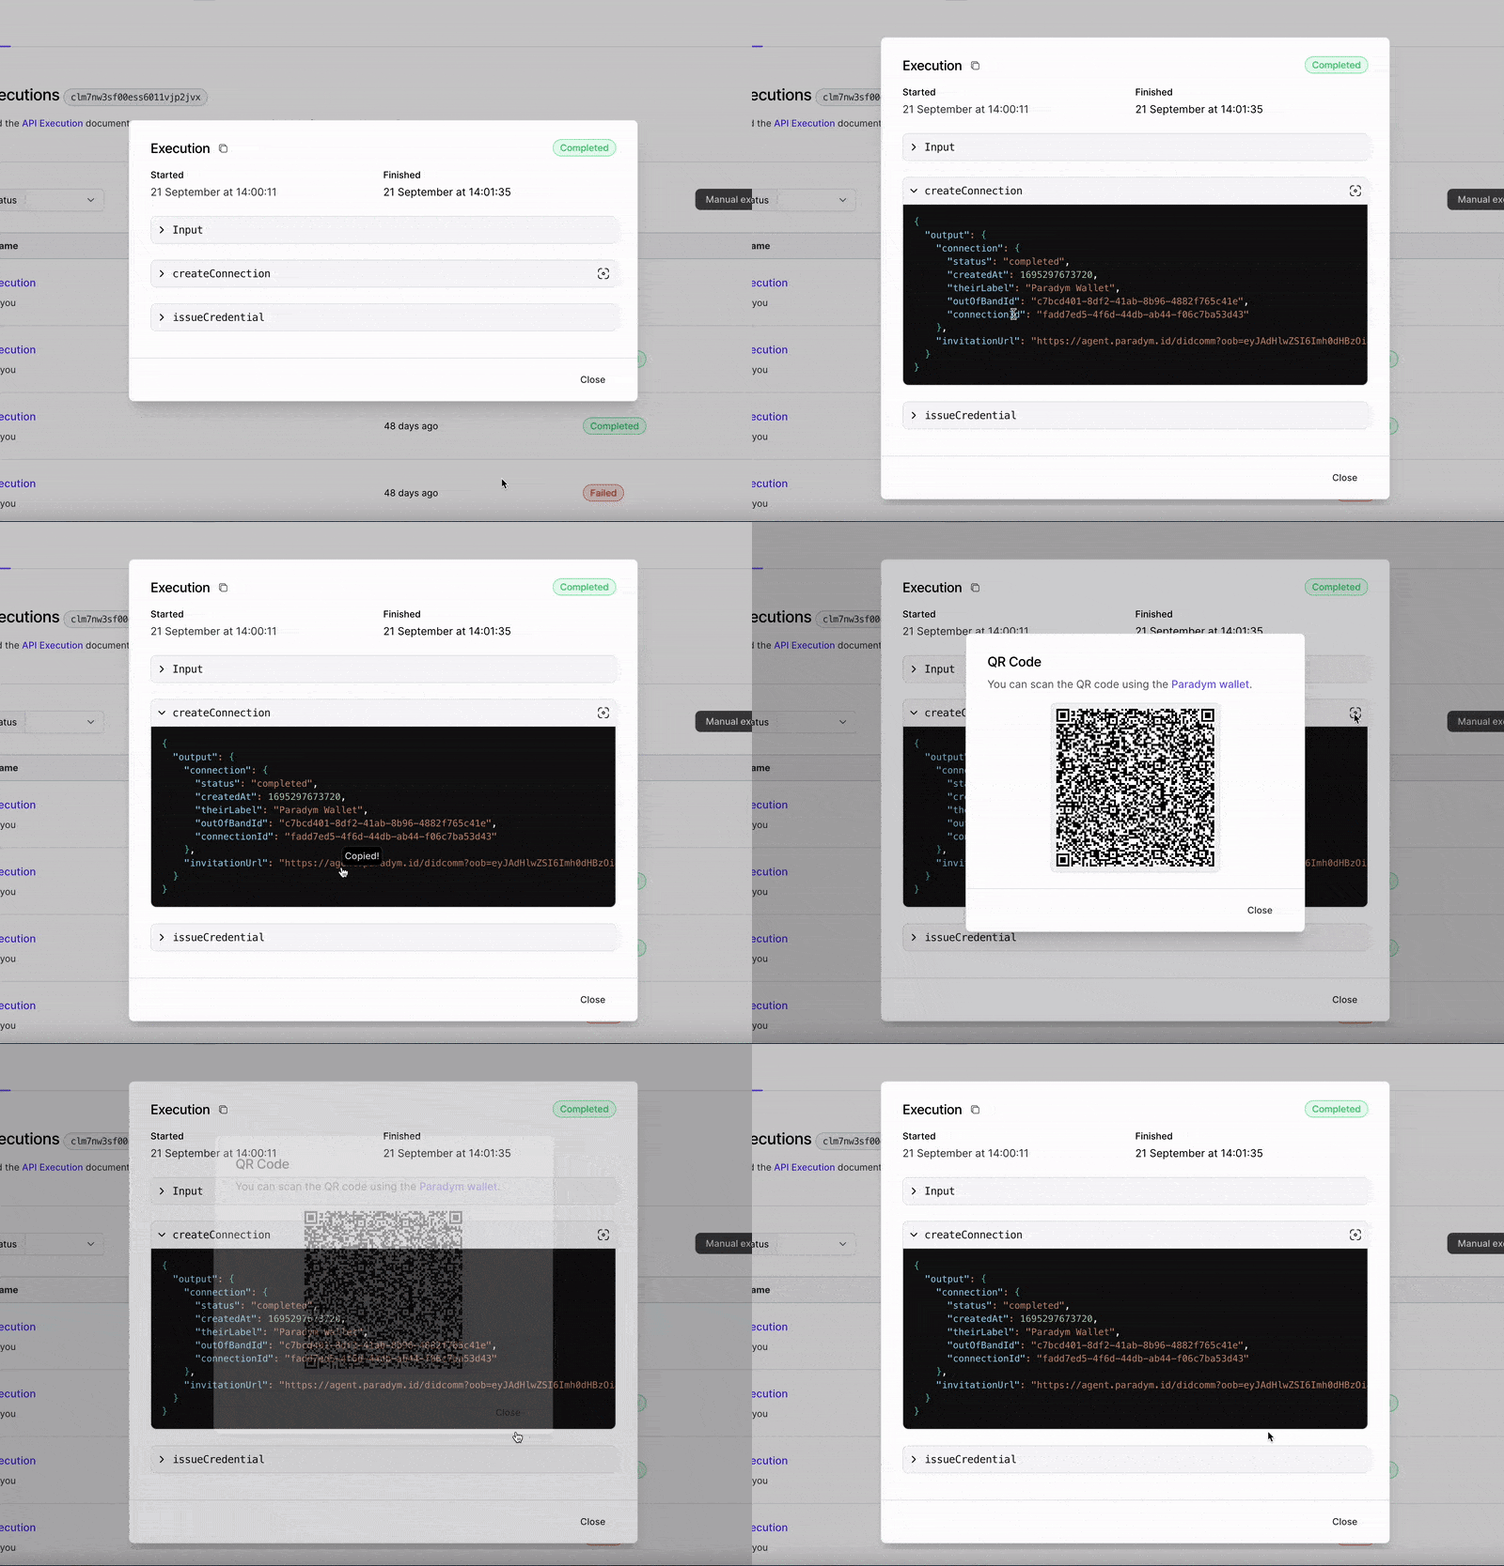
If your workflow needs a response from another action or the holder, it will be put in an ‘on hold’ status. In the execution detail view, you’ll find everything you need to know about your workflow sorted by action. Including the information needed for your end-user to progress through the flow. You can copy any workflow output directly by hovering above it and selecting. If any actions in your workflow result in a URL, a QR symbol will appear in the top right corner of the action output that enables you to generate a QR directly. When testing with a mobile application, this enables you to progress through the flow yourself.

Going to Production
Once your workflow is set up and functioning to your satisfaction, you can use the API to extract the date from the workflow execution. Using the API to retrieve an execution is useful when workflows are executed through the API, or when a webhook event was triggered for an execution. You'll need to set up an Api Key to interact with the Paradym Api.
After that you can make a GET request to retrieve the execution payload. If you are attached to using a QR code after all your manual testing, you can use the extracted URL to generate a QR code for you end-user, or you can use it any other way you prefer.
Now it's time to build and make sure the interaction between your solution and your mobile identity wallet is seamless!

