Check out the YouTube video of this tutorial for a complete walkthrough of the demo application and its workflows.
Ready to build a decentralized identity solution fast? 🚀
Verifiable Credentials are a digital form of credentials that enable you to send and receive proof of any digitally issued identity information. While this reasonably new technology is incredibly powerful, as it enables you to share information in a way that’s fast, user-centric, private, and secure, it can also be difficult to work with.
If you’re looking to get all the benefits from using verifiable credentials in your application, with none of the months-long learning curve, we highly recommend you take a look at Paradym. Paradym is a workflow builder specialized in working with verifiable credentials (VCs). The straightforward YAML syntax enables you to start building immediately, with no time spent decoding overly complex infrastructure issues.
In this tutorial, we’ll show you how to build an actual use case using verifiable credentials and how to integrate Paradym into your project. We'll issue a credential for achieving a highscore in a snake game 🐍 using Paradym. We’ll be building a total of two workflows and integrating those in a TypeScript-based web application using Paradym's REST API and webhook interface.
Again, check out the YouTube video below for a complete walkthrough of the demo application and its workflows. Let’s get into it!
Steps
- Register a high score badge credential 🪪
- Issue a high score badge 🏆
- Integrate with the web application 🛠️
Before you begin
This tutorial uses Paradym, a workflow builder for developers that provides the actions, workflows, and infrastructure you need to use verifiable credentials in your solution.
If you don't have an account yet, you can start with our quick start guide.
This demo also uses the Paradym Wallet, an open-source companion app to the Paradym platform available on the Apple App Store and Google Play Store.
This demo app requires two workflows, which we'll put in this tutorial and on GitHub, as well as the web application used to demo the integrated end result.
0. Intro
The workflows you build in Paradym are used for any process where information or proof of information is exchanged. A typical workflow contains four components:
- Name, a way to recognize your workflow in the platform
- Trigger, a way to execute your custom-made workflows
- Input Object, a JSONSchema that validates the input of your workflow
- Actions Array, the steps that your workflow takes to reach its overall goal
The actions are the building blocks with which you can customize your workflow. They enable you to make connections, issue credentials, request presentations, etc., in any order your application requires. Your workflow can hold for the input of a third party or execute all at once, depending on the specific actions you’ve chosen. Often, one workflow is to implement one user flow, meaning that at the beginning, a new user process is started, and at the end, a result is achieved.
Our snake high score credentials app requires two workflows.
- Register Credential Template: workflow used to register your credential schema and definition. The result of this workflow is used in the issuance workflow.
- Issue High Score Badge: workflow used to issue the achievement credential once the player beats the high score.
If you’re new to verifiable credentials and want to learn more about their features and benefits, we recommend taking a look at this repository.
1. Register a Credential 🪪
The first step is to register the "High Score Badge" credential through the Paradym UI.
When we register a credential template, we basically store the general form of a credential in order to use it later, as many times as needed. For example, a credential template for a driver’s license might contain name, date of birth, and other personal attributes, as well as attributes for the type of vehicle you’re licensed for.
The registered credential template does not have any actual user information in it yet, just the attributes that make up the credential.
Using Paradym you can define the credential attributes in the template itself (see our tutorial on Issuing and Verifying Education Credentials for that), or use a general template and define the attributes through the UI or API. If you intend to reuse your workflow to register different credentials, you might want to choose a reusable workflow template. For our snake game that's exactly what we'll do. We can use the Paradym template for registering a credential by selecting it in the workflow editor through 'templates'.
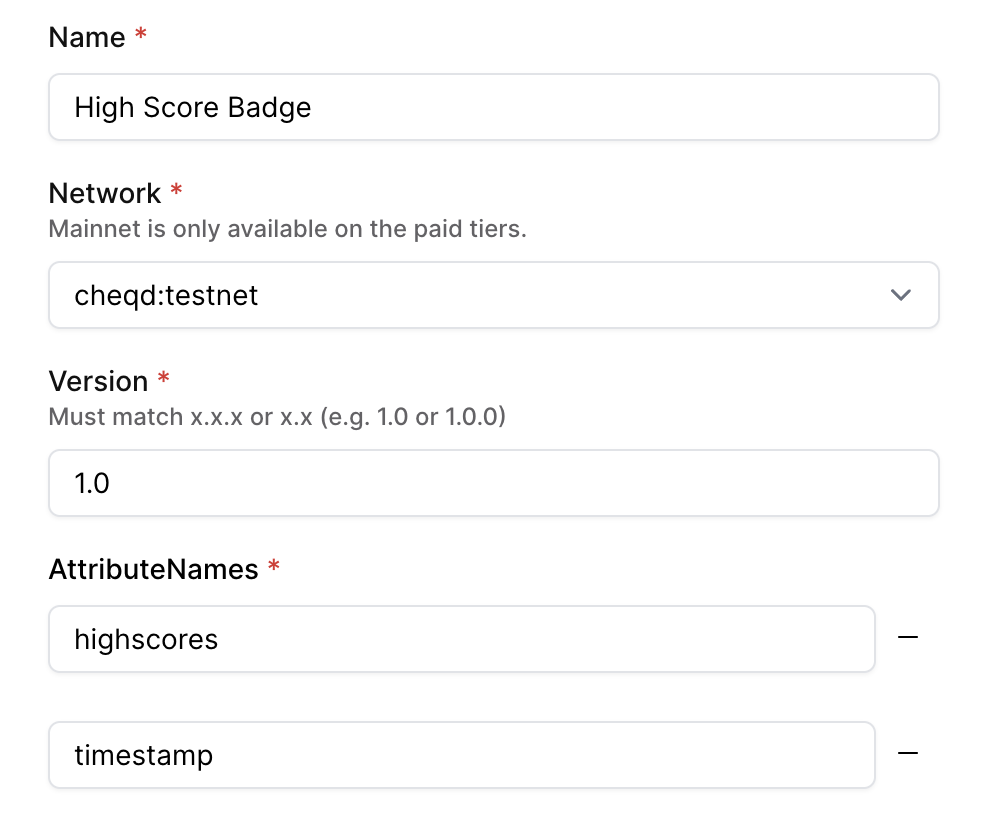
This template can be published and ran immediately without changes, and it will prompt you to fill out the expected attributes like the name of the credential, the version, the network and the attribute names.
highscoretimestamp
Steps
-
Create a new workflow from the Register Credential Template template
-
The workflow will be triggered through an API call
-
The workflow requires input in the form of an object. Remember, we're keeping this generic and filling it with our specific High Score Badge attributes later! The input properties are: a. attributeNames, an array of the credentials attributes b. name, the name of the credential c. version, the version of the credential d. network, the network the credential template will be stored on
-
The actions array requires two actions:
- Create a schema with our previously mentioned attributes that we get from the input object. The
createSchemaaction will output aschemaIdfor future use. - Create a Credential Definition using the created schema.
- Create a schema with our previously mentioned attributes that we get from the input object. The
You can access action output in other sections of the workflow using $.actions.<actionId>.output.<value> You can read more about the specific inputs and outputs of the createSchema and createCredentialDefinition actions in the Paradym Docs.
name: Register Credential Template

trigger:
  type: api

# Workflow can be triggered through the API (or manually through the UI)
trigger:
  type: api

# Input object allows to dynamically pass the name, version and attributes of the schema
input:
  type: "object"
  properties:
    attributeNames:
      type: array
      items:
        type: string
    name:
      type: string
    version:
      type: string
      description: Must match x.x.x or x.x (e.g. 1.0 or 1.0.0)
      default: "1.0"
    network:
      type: string
      default: "cheqd:mainnet"
      enum:
        - "cheqd:testnet"
        - "cheqd:mainnet"
  required:
    - name
    - version
    - attributeNames
    - network

actions:
  - id: createSchema
    name: anoncreds/createSchema@v1
    attributes:
      attributeNames: $.input.attributeNames
      name: $.input.name
      version: $.input.version
      network: $.input.network

  - id: createCredentialDefinition
    name: anoncreds/createCredentialDefinition@v1
    attributes:
      schemaId: $.actions.createSchema.output.schemaId
      tag: $.input.name
The process to actually register the credential is pretty straightforward. You’ll just have to execute it:
- Publish the workflow, by clicking 'Publish'.
- Run the workflow, by clicking 'Run'.
When running the workflow you'll be prompted for input, just like we instructed our workflow to do! Now fill out the following fields:
You only have to register a credential one time to use it to issue as many credentials as you want.
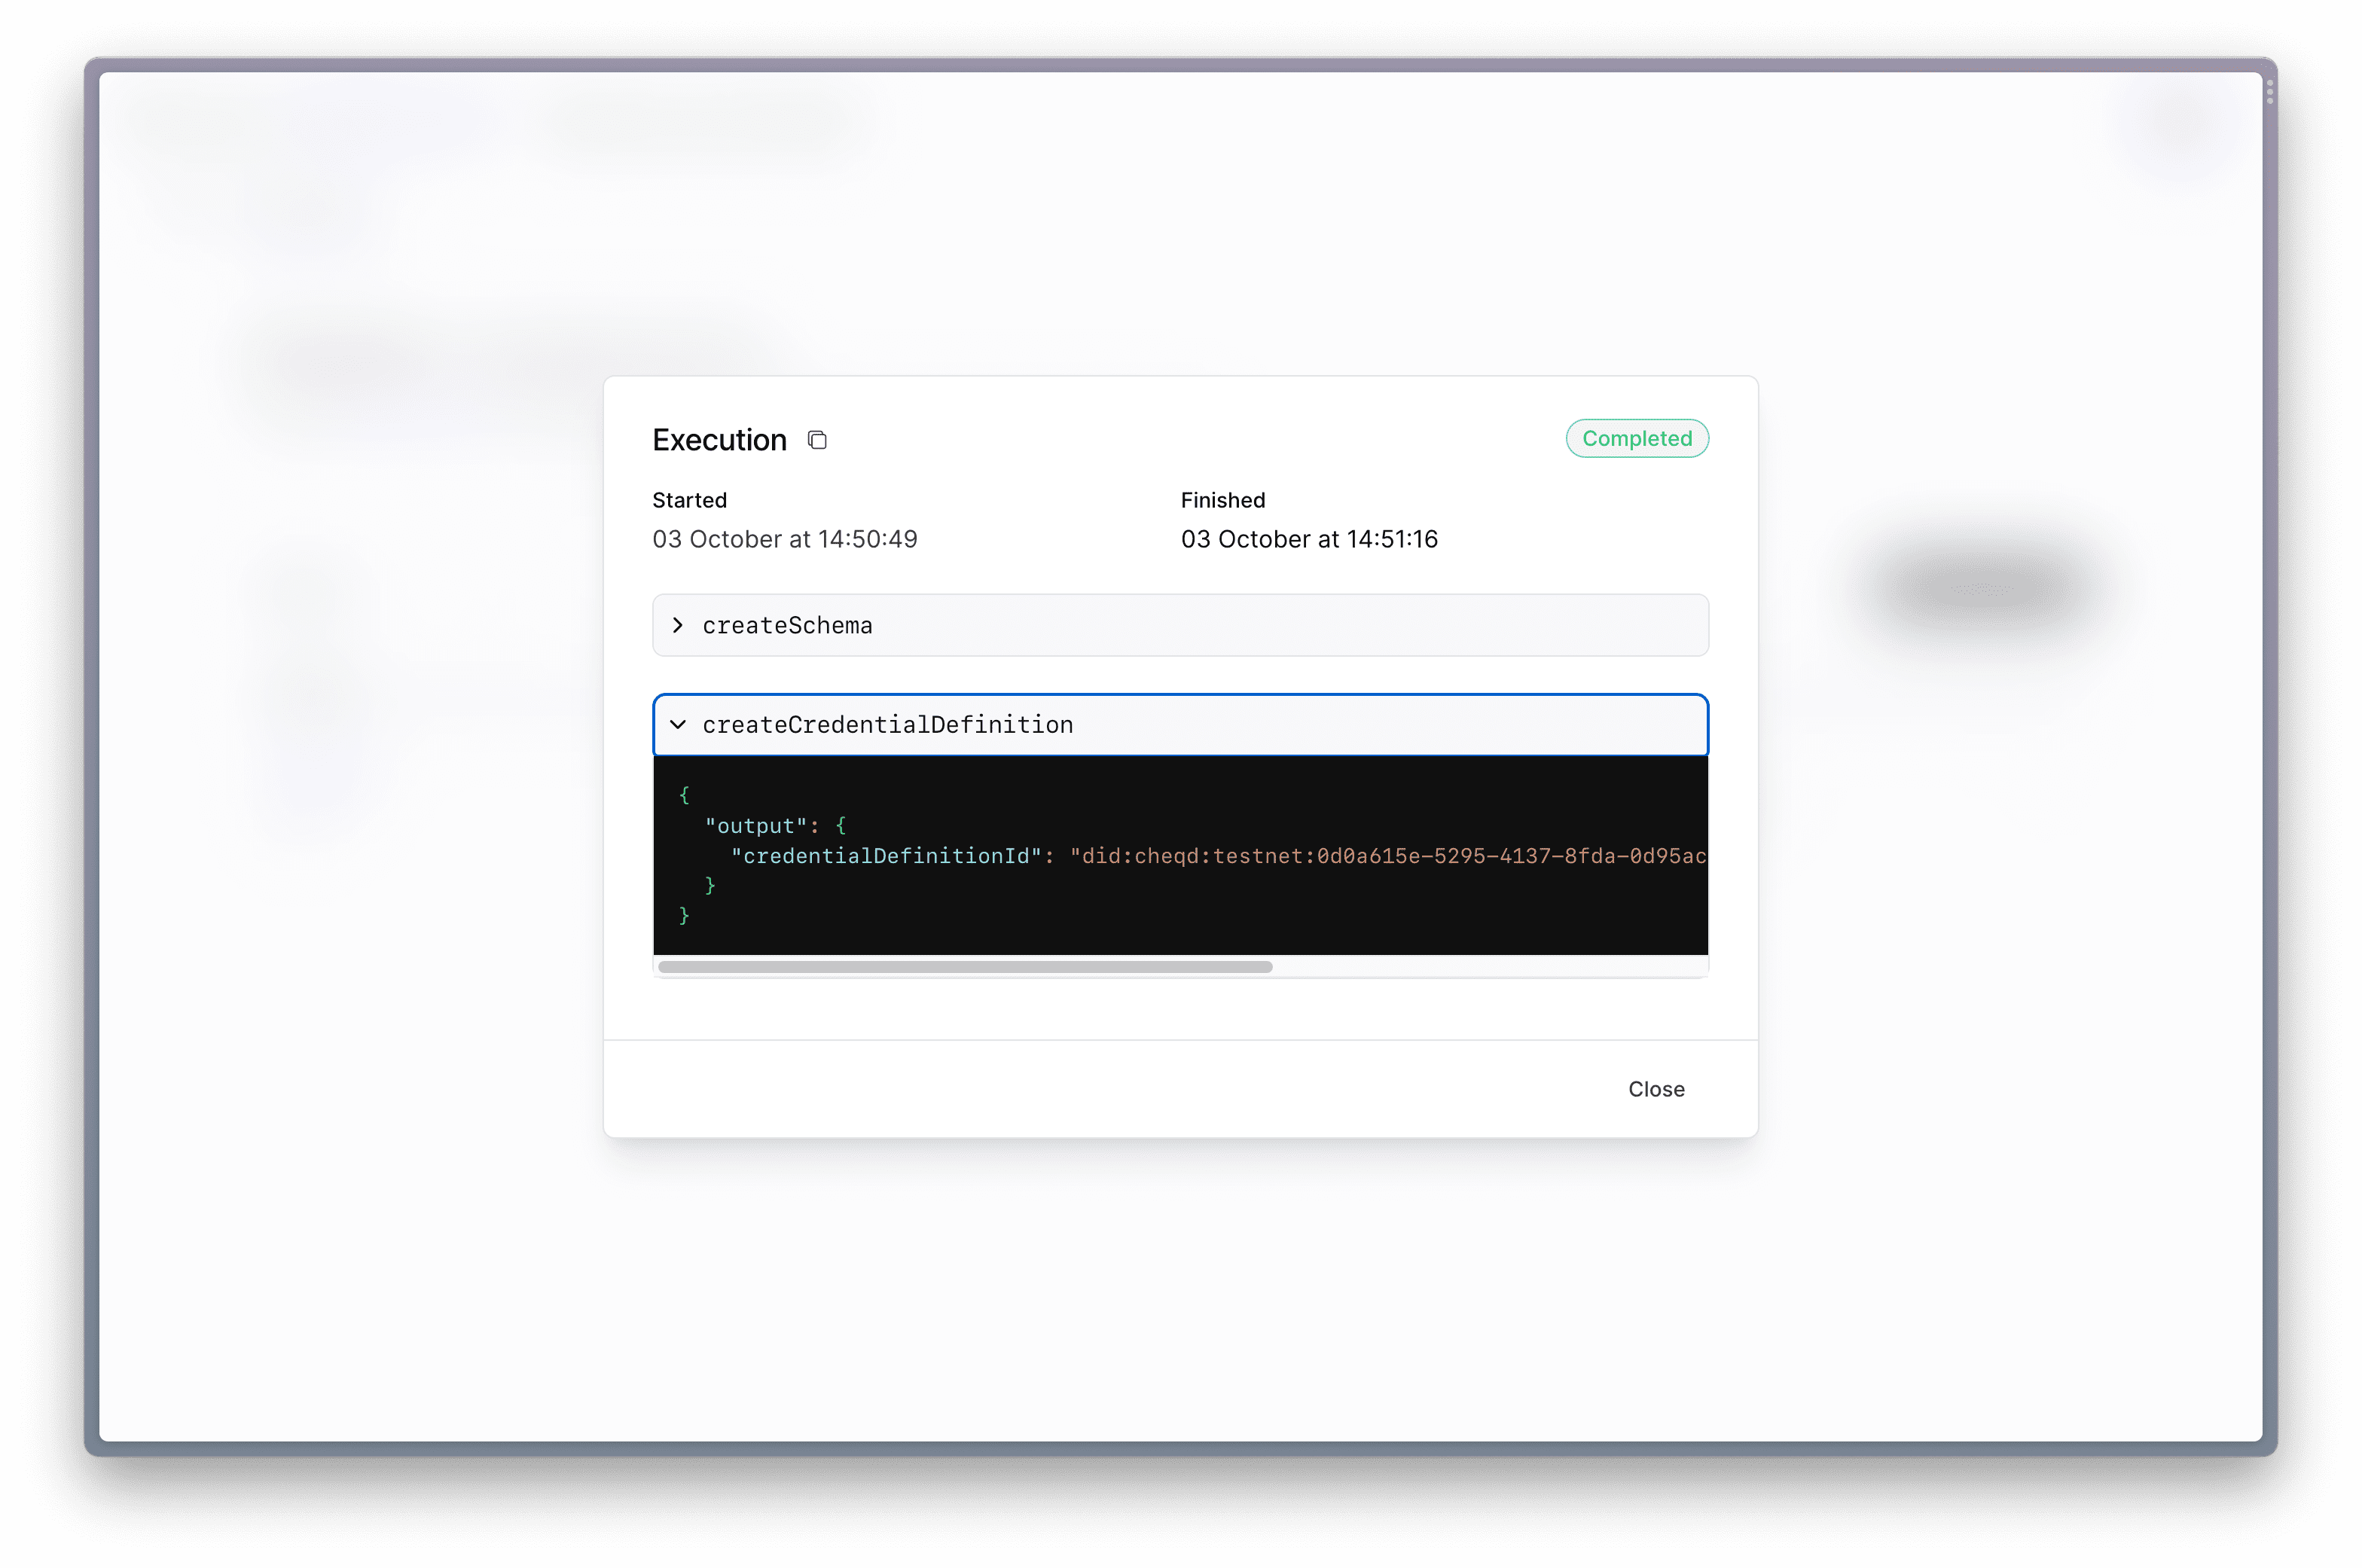
The output will show the generated Credential Definition ID, which you'll need for the next workflow. You can copy the Credential Definition ID in the execution window by hovering over and copying it.
2. Issue a High Score Badge 🏆
Next, we’re going to create a workflow to issue the certificate we just registered. Once a template is registered, credentials can be issued as many times as you need. An issued credential does contain the actual user information (not just the empty attributes) and is bound to the person to whom it is issued. An issued certificate of a driver’s license might contain your specific name, date of birth, and other relevant information.
A person or organization stores their credentials in a wallet. For this tutorial, we recommend you use the Paradym mobile wallet. It’s available on iOS & Android, free and open-source, and will enable you to try your demo project end-to-end yourself!
The workflow we’ll create will make a connection and then issue a highs score badge credential to that connection.
Steps
-
Create a new workflow and name it Issue High Score Badge, you can copy the one below or edit the Issue an Employee Badge template
-
The workflow will be triggered through an API call
-
The workflow requires some input
- It requires information to fill in the attributes we defined when creating the credential template. A
highscore, and atimestamp.
- It requires information to fill in the attributes we defined when creating the credential template. A
-
The actions array requires two actions:
- Create a connection between the Game platform (issuer) and the Player (holder).
- Issue the credential to the connection made using the created
connectionId(internal reference) andcredentialDefinitionIdfrom the previous workflow (the one you copied from the output).
You can read more about the specific inputs and outputs of the createConnection and issueCredential actions in the Paradym Docs[1][2].
name: Issue High Score Badge

trigger:
  type: api

input:
  type: 'object'
  properties:
    highscore:
      title: Highscore
      description: Highscore of the user
      type: string
    timestamp:
      title: Timestamp
      description: Date and time of when the highscore was achieved
      type: string
  required:
    - highscore
    - timestamp

actions:
  - id: createConnection
    name: didcomm/createConnection@v1

  - id: issueCredential
    name: didcomm/issueCredential@v1
    attributes:
      connectionId: $.actions.createConnection.output.connection.connectionId
      anoncreds:
        credentialDefinitionId: <YOUR_CREDENTIAL_DEFINITION_ID>
        attributes:
          highscore: $.input.highscore
          timestamp: $.input.timestamp
Publish the workflow to make it active. When running this workflow, an invitation URL will be created that, when turned into a QR code, can be accepted by the user (player) through their mobile wallet.
The workflow does not need to be executed manually, as it will be executed through the demo application & API.
3. Integrate with the web application 🛠️
For this section we recommend also checking out the README as it has more detailed project setup information
Before we can see the whole end-to-end application (and our workflows in action), we need to integrate Paradym with the demo application. The demo application can be cloned from the GitHub repository. We will need to do some general setup to get the project up and running, as well as some Paradym specific setup to connect our workflows. We will also use ngrok to run the project.
In the projects' packages/server/.env file we will have to define a couple of environment values.
- Paradym API Key, to call the API to execute our workflows
- Paradym Webhook Secret, using webhooks we can listen for changes in our workflow executions
- Workflow ID of the "Issue High Score Badge" workflow, so we know which workflow to trigger
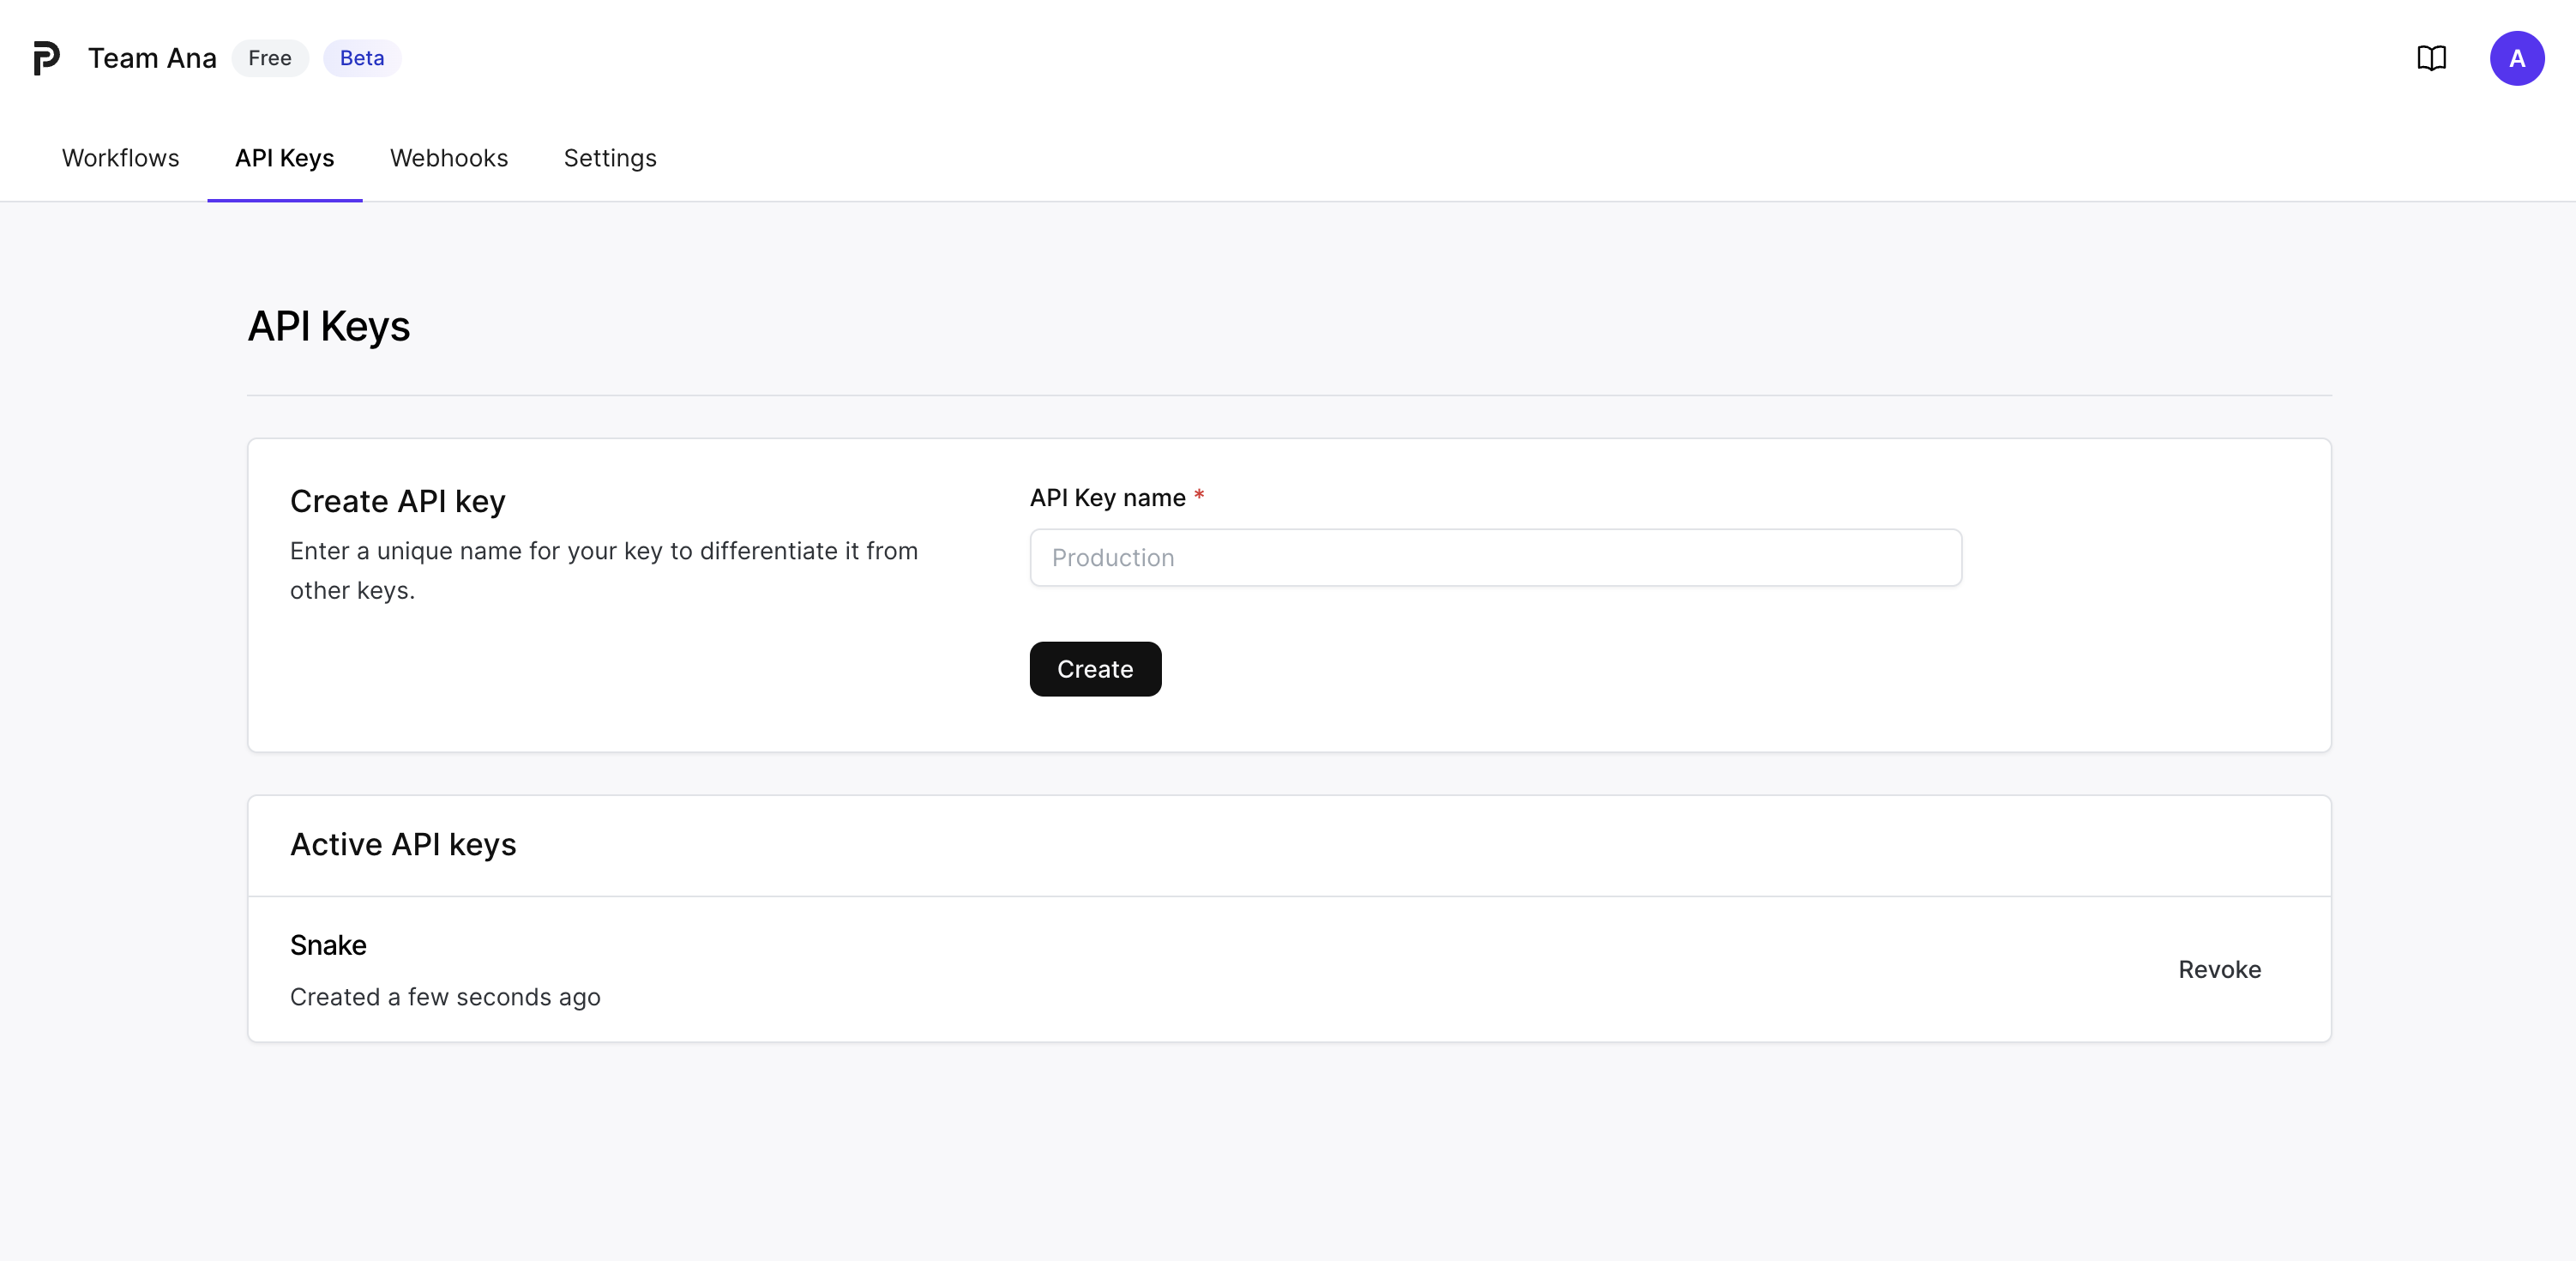
The API key and webhook secret can be generated in the ‘API Keys’ and 'Webhooks' tab in the Paradym dashboard respectively.
Steps
- Create an API Key in the Paradym dashboard by giving it a name (like 'snake-api') and pressing the ‘Create’ button. Copy the API key and set it as the value for the
PARADYM_API_KEYenvironment variable inpackages/server/.env. - Expose port 3000 to the internet by using ngrok.
a. Install ngrok
b. Connect (and make) your ngrok account
c. Once you have installed ngrok, you can run
ngrok http 3000. Make sure to put 3000 as that is where your app is. - Use the https 'Forwarding URL' that ngrok generates to create your webhook in the Paradym dashboard. Make sure to add /webhook after the url (e.g.
https://107a-123-123-123-123.ngrok-free.app/webhook). - After creating the webhook endpoint, copy the webhook secret and set it as the value for the
PARADYM_HMAC_SIGNATUREinpackages/server/.env.
NOTE: Keep the ngrok server running and use a different terminal window for the following steps. If you restart the ngrok process, the URL will change and you have to reconfigure the webhook URL in paradym
-
Copy the workflow ID (from the "Issue High Score Badge" workflow) into the app. You can find this ID in the executions page of the workflow.
-
Run the demo application!
- Run
yarn && yarn devin the project folder to start the demo application - It will now be available on localhost 3000
- Run
You can now use the application together with the Paradym wallet! You can play the game and if you get a high score, claim your badge!
Great job! 🚀
We’ve built two workflows that enable our game platform to issue credentials. We’ve learned how to integrate these flows into our demo application. And we’ve become digital identity pros!
Don’t forget to join the Paradym Community Slack and show us all of the awesome things you’re building (or ask us all of the questions).